Seemingly simple foods all have their time and place even though they're often overlooked. If I had to survive on just one simple food item, it would definitely be a warm loaf of bread, fresh from the oven, smeared with french butter. Okay, that’s two food items. But there's really nothing more satisfying than warm bread coated in butter. Screw those low carb diets. This is a classic and delicious combination of food, yet so simple that restaurants often supply dinners with free bread and butter in the same manner they supply the tap water.
So how can you improve this delicious combination without ruining its simplicity?
Bake the bread yourself.
Even though bread is so basic, containing just flour, yeast, salt and water in the simplest of loaves, people rarely bake their own bread. People prefer buying freshly baked loaves from their local bakery and commonly sacrifice taste and texture for the packaged bread cluttering grocery store aisles.
When you bake your own bread, you feel a sense of pride and ownership over your bread that only comes from chaperoning the dough from start to finish. You become attached while you're kneading the dough in your hands, watching it rise slowly in the oiled bowl, delicately shaping the loaves and sitting on the floor by the oven door watching them bake though the tiny window. All the while the yeasty aroma begins to dance through the air awakening your senses of the delights to come.
My specialty breads are brioche and cinnamon-raisin bread, but I wanted to try my hand at baking a crusty, rustic loaf. I wanted to bake a bread using the minimal four ingredients required. I started with the Rustic Italian Loaf from Baking Illustrated. I was curious to see what results such minimal ingredients would produce. Here's my adaptation of the recipe, which yields one very large and very delicious loaf of bread.
Starter Ingredients:
2 cups bread flour¼ teaspoon active dry yeast
1 cup water, room temp
Dough Ingredients:
3 cups bread flour
1 teaspoon active dry yeast
1 1/3 cups water, room temp
2 teaspoon table salt

To make the starter:
1. Combine the flour, yeast and water in the bowl of an electric mixer. With the dough hook, knead at the lowest speed until all ingredients come together, about 3 minutes. Transfer to another bowl and cover with plastic wrap. Let the starter rest for 3 hours at room temp, then store in the fridge for 8-24 hours.

To make the dough:
1. Let the starter come to room temp while you prepare the dough. Place the flour, yeast and salt in the bowl of an electric mixer and knead with the dough hook on the slowest speed until the ingredients come together, about 3 minutes. Cover with plastic wrap and let sit at room temp for 20 minutes.
2. Remove the plastic wrap and add the starter and salt. Knead at lowest speed until the dough and starter are mixed together, about 4 minutes. Increase the speed to medium-low and mix for one more minute while the dough comes together into a ball.
3. Transfer the dough into a large oiled bowl and cover with plastic wrap. Let the dough sit at room temp for one hour.
4. Remove the plastic wrap and fold the dough in the following manner: grab one side of the dough and fold it into the center of the mound of the dough, then do the same on the other side of the dough. Repeat this perpendicular to the first folds. You will end up with a square-ish shape of dough. Replace the plastic wrap and let sit another hour.


5. After one hour repeat the folding process described above and let sit another hour.
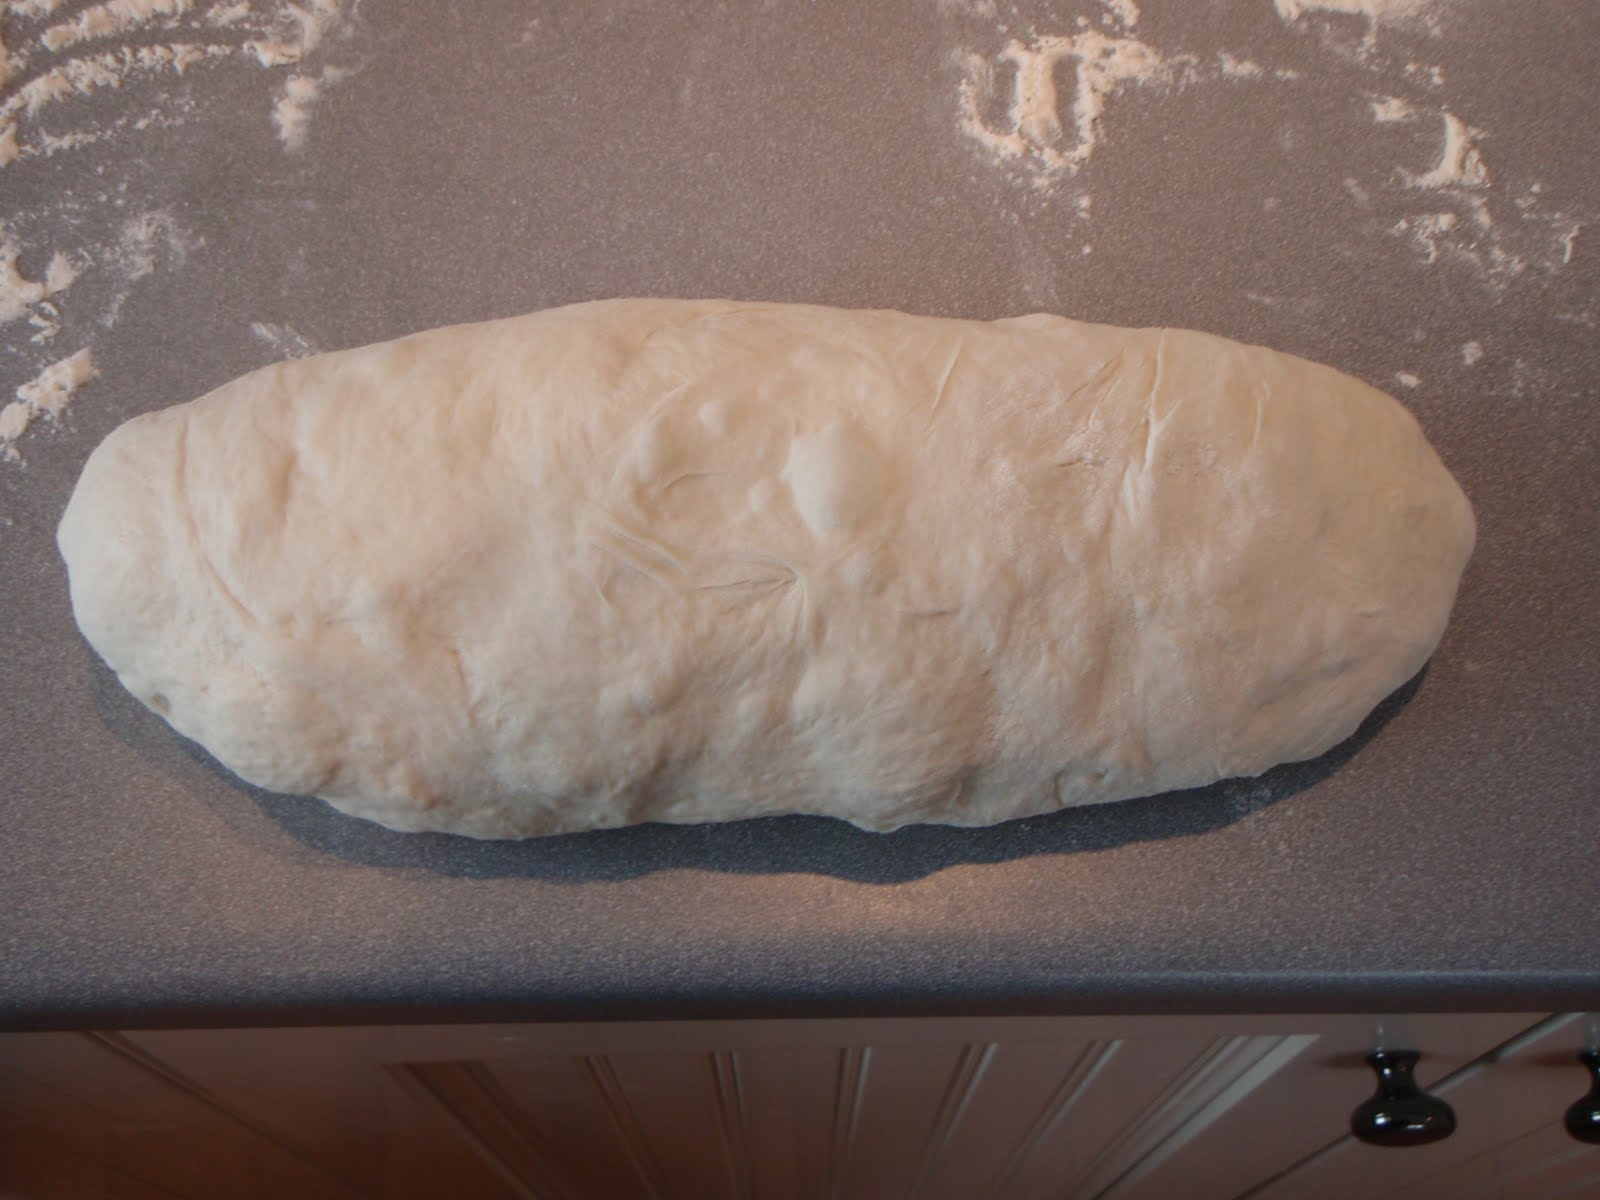
6. Dust your work surface with flour and place the dough on the surface. Roughly form the dough into a 8 x 10 inch square using your hands. Now shape the loaf following these instructions: fold the top right corner of the dough into the center, followed by the top left corner. Gently roll the dough from this pointed top and continue rolling until a log is formed and the seam is on the bottom. Transfer the loaf onto a baking sheet lined with parchment paper. Dust the loaf with flour and cover with plastic wrap, then let the loaf rest for an additional hour.


7. Preheat the oven to 500 degrees F and place a baking stone (or baking sheet if you don’t have one) into the oven. Using a razor blade, cut a slit along the top of the loaf leaving about ½ inch on each end of the loaf. Spray the loaf with a small amount of water then slide onto the baking stone/sheet in the oven.

8. Bake at 500 degrees F for 10 minutes, then reduce the temp to 400 degrees F and bake an additional 35 minutes. After about fifteen minutes of baking at 400 degrees F, cover the loaf with aluminum foil to prevent to exterior from browning too much.
9. Remove from the oven and place on a cooling rack. Don't cut into the bread until it has cooled about two hours, but if you're like me you won't wait. If that's the case, then promptly smother in good butter and enjoy.


Coming up next- a rustic country loaf baked with two types of flour.
No comments:
Post a Comment